


Night Guard Yellowing: 3% H2O2 Soaks, Ultrasonic Fix, When to Replace
Most night guard yellowing is surface biofilm and mineral buildup, not permanent damage. Rinse it in cool water, brush gently with a dedicated soft brush and mild soap, and let it air-dry completely. For spots that won’t budge, a short soak in diluted hydrogen peroxide or a denture tablet solution usually clears the rest.
TL;DR:
- The primary cause of night guard yellowing is bacterial biofilm buildup and mineral deposits, not the plastic aging itself.
- Daily rinsing immediately after removal and gentle brushing with a soft brush and mild soap prevent most superficial stains and odors.
- Deep cleaning methods like denture tablets, hydrogen peroxide, or ultrasonic cleaning can restore clarity but won’t reverse plastic oxidation.
- Avoid using hot water, toothpaste, bleach, alcohol mouthwash, or storing the guard wet in a closed case, as these damage the material and promote bacteria.
- Signs of needing a replacement include persistent odor, micro-cracks, loss of thickness, or warping, especially if cleaning no longer improves appearance.
Table of Contents
- What causes night guard yellowing?
- How do you clean a night guard every day to prevent yellowing?
- What’s the best way to deep clean a yellowing night guard?
- What should you never use to clean a night guard?
- When does a yellow night guard need to be replaced instead of cleaned?
- Does material quality actually affect how fast a guard yellows?
- Ready to replace a stained or worn night guard?
- Where to learn more about night guard care
- Sources
What causes night guard yellowing?
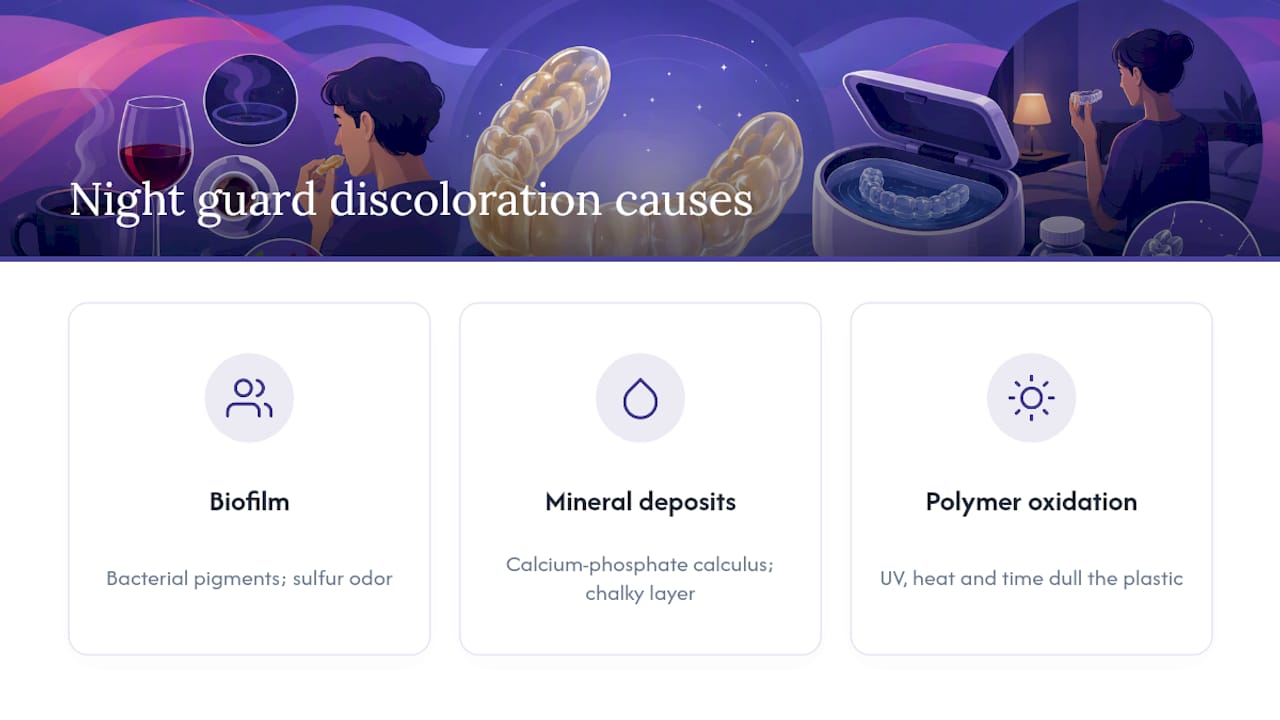
Yellowing starts with biofilm. It’s the same sticky bacterial film that coats your teeth overnight, except now it’s coating a piece of acrylic or thermoplastic that sits in your mouth for six to eight hours straight. Anaerobic bacteria inside that film produce sulfur compounds as a byproduct, which is where the smell comes from, and pigments from those bacterial colonies build up as a yellow or gray tint over time.
Saliva adds a second layer to the problem. It carries calcium and phosphate minerals that precipitate onto the guard’s surface as a hard, chalky deposit called calculus, similar to tartar on natural teeth. On the somewhat porous acrylic used in many night guards, that mineral layer has more surface texture to grip onto.
There’s a third factor that no amount of cleaning reverses: the plastic itself ages. UV exposure, heat, and simple time cause the polymer to oxidize, which dulls clarity from the inside out rather than the surface. Dry mouth, coffee, red wine, and tobacco all speed up staining, and so does letting the guard sit damp in a closed case instead of drying fully. If your guard still looks cloudy after a thorough clean, you’re probably looking at oxidation rather than biofilm.
How do you clean a night guard every day to prevent yellowing?
The single biggest factor in preventing night guard yellowing is what you do in the sixty seconds after you take it out. Rinsing immediately flushes away saliva proteins before they dry and harden into the film that eventually stains and smells.
Here’s the daily routine that keeps most guards clear for months:
- Remove the guard and rinse it under cool running water right away, before breakfast or coffee.
- Brush gently with a soft toothbrush kept just for the appliance and a drop of mild, fragrance-free soap, never toothpaste.
- Rinse again to clear soap residue, then shake off the excess water.
- Set it on a clean towel or open case and let it air-dry completely before storing it away.
- Leave the case open (or vented) until the guard is fully dry, and keep it away from windowsills, car dashboards, or anywhere it will bake in heat or sunlight.
Dentists specifically recommend a dedicated soft brush rather than the one you use on your teeth. Sharing a brush cross-contaminates both surfaces, and the same bristles that are fine on enamel can be too abrasive for acrylic over time.
Pro Tip: Keep a small travel case with your guard’s cleaning brush already inside. If the routine takes zero extra setup, you’ll actually do it every morning instead of “when you remember.”
What’s the best way to deep clean a yellowing night guard?
Daily rinsing handles most of the problem, but biofilm and minerals still accumulate in ways a quick brush won’t fully remove. A weekly or biweekly deep clean using one of the methods below usually restores clarity without touching the guard’s actual structure.
- Denture-cleaning tablets: Dissolve one tablet in warm, not hot, water and soak the guard for the time listed on the package, typically 15 to 30 minutes. Once or twice a week is usually enough for routine maintenance.
- 3% hydrogen peroxide: Soak the guard in peroxide, either full strength or mixed 1:1 with water, for 15 to 20 minutes, then rinse thoroughly and brush lightly. Don’t leave it soaking longer than 30 minutes; extended exposure starts to break down the material rather than just cleaning it.
- White vinegar for mineral buildup: Mix one part vinegar to three parts water and soak for up to 30 minutes when you’re dealing with a chalky, tartar-like film rather than yellow discoloration. Rinse well afterward since the acidity lingers on the surface.
- Baking soda paste: A light paste rubbed on with a fingertip can lift mild surface staining, but use it sparingly. It’s mildly abrasive, and frequent use scratches the same way toothpaste does.
For guards that have gone past what soaking can fix, professional ultrasonic cleaning at your dentist’s office uses sound waves to dislodge biofilm and calculus embedded deep in the material’s texture, typically in a session lasting 5 to 10 minutes. It’s the closest thing to a full reset for a heavily stained guard, and it won’t damage the surface the way scrubbing with an abrasive would. Healthline and most dental hygiene guides suggest working a monthly deep clean into your routine even if the guard looks fine, since mineral buildup often starts before it’s visible.
If you’re using a combination retainer and night guard, the same daily and weekly routines apply, though cleaning a retainer properly involves a few extra considerations around wire components if yours has any.
What should you never use to clean a night guard?
A few common habits do more harm than the yellowing itself, and most people don’t realize it until the guard is already warped or scratched beyond saving.
- Hot water. Even a brief rinse under hot tap water can warp thermoplastic material enough to throw off the fit permanently. Once that happens, no amount of cleaning brings back the seal you need for real protection.
- Toothpaste. The abrasive particles that polish enamel scratch acrylic surfaces on contact. Once micro-scratches form, they trap more biofilm than before, so the guard actually stains faster after you’ve been “cleaning” it with toothpaste.
- Bleach and alcohol-based mouthwash. Both chemically degrade the plastic, and the discoloration that follows is often permanent rather than a stain you can soak away.
- Storing it wet in a closed case. Trapped moisture without airflow is exactly the environment anaerobic bacteria need, which is why a guard that goes straight into a zipped case after use often smells worse within days.
When does a yellow night guard need to be replaced instead of cleaned?
Some yellowing is just cosmetic and comes out with a proper soak. Other signs mean the material itself has broken down, and cleaning won’t bring it back.
Watch for a foul odor that returns within a day or two of a thorough deep clean, visible micro-cracks or a rough, pitted texture, or areas that feel thinner or noticeably more flexible than the rest of the guard. If discoloration or smell persists despite consistent cleaning, that usually points to bacteria and minerals that have worked their way into cracks a brush can’t reach, not a cleaning failure on your part.
The health stakes are real, even if the yellowing itself isn’t dangerous. A guard harboring bacteria can irritate gum tissue, transfer pathogenic bacteria back into your mouth every night, and, if it’s warped, stop protecting your teeth from grinding at all, which defeats the entire point of wearing one.
Most guards last several months to a few years, but the exact duration depends heavily on how hard you grind and how consistently you maintain them. Heavy bruxism combined with inconsistent care can wear a guard out in under a year, while a lighter grinder with a solid daily routine might stretch a guard well past the two-year mark. If you’re seeing warping signs, our guide on mouth guard replacement indicators breaks down exactly what to look for before you order a new one.
Does material quality actually affect how fast a guard yellows?
Cleaning habits matter more than almost anything else, but the material you start with sets the ceiling on how well those habits pay off. FDA-approved materials fabricated under consistent lab supervision tend to have fewer surface irregularities than lower-grade acrylics, and fewer irregularities means less surface area for biofilm to grip in the first place. That’s not a reason to skip the daily rinse. It’s a reason to expect a better baseline from a guard you’re already committed to cleaning properly.
The bigger practical advantage shows up when it’s time to replace, not while you’re cleaning. A guard that’s been scanned and stored digitally means you’re not starting over with a new impression kit every time yellowing crosses from “clean it” to “replace it.” That single detail cuts the gap between noticing a problem and actually fixing it, which matters more than it sounds like when you’re the one waking up with a stained, smelly guard every morning.
Whitening accessories fit into this picture too. A tooth whitening serum or bleaching trays used alongside a clear retainer or night guard work best when the appliance itself is already clean, since residue on the surface can interfere with even contact against your teeth.
Ready to replace a stained or worn night guard?
If your current guard is past the point cleaning can fix, cracked, warped, or just permanently dull no matter what you soak it in, ordering a replacement online can be a convenient option. Heavy grinders usually get more mileage out of a Hard Night Guard, while anyone who wants both arches covered can order the Upper and Lower Retainer-Night Guard set in one go.

Every order starts with a self-impression kit you complete at home, and once your impressions are on file, File Your Smile keeps a digital copy on hand so your next reorder skips the impression step entirely. Pair a new guard with teeth bleaching trays or a tooth whitening serum if you’re addressing tooth color at the same time. Whatever you order, stick with the daily rinse-and-dry routine from the start. It’s the difference between a guard that stays clear for years and one you’re troubleshooting again in a few months. Browse the full night guard lineup to find the right fit for how you grind.
Where to learn more about night guard care
For deeper background on the guidance in this article, the ADA’s home care recommendations cover general appliance hygiene, while dental practice guides on cleaning routines, deep-clean soaks, and replacement signs go into more clinical detail. If your guard’s odor or discoloration doesn’t respond to any of these methods, talk to your dentist rather than guessing further.
Sources
- Keep Your Mouth Guard Clean & Fresh | Falko Family Dental
- Why Your Night Guard Smells Bad & Turns Yellow | HCMC Dental
- How to clean a nightguard | Shedd Family Dental
- ADA home care guidance | American Dental Association
- How to clean mouthguard (Healthline)