


What to Do When Your Night Guard Cracks
If your night guard has a visible crack that runs through the material, has sharp or jagged edges, or feels like it could shed a piece while you sleep, stop wearing it tonight. If the crack is a shallow surface mark and the guard still seats and feels normal, you can likely wear it a few more nights while you get it checked, but don’t wait long. Either way, get it in front of your dentist for a real look.
TL;DR:
- A crack that fully splits the guard or has sharp jagged edges requires immediate replacement to prevent choking and oral injuries.
- Signs of damage include full-thickness cracks, holes, persistent odor, or when the guard no longer fits properly or causes jaw pain.
- Repair is only safe for minor, localized cracks; avoid DIY fixes with household glues and seek professional repair for early, shallow damage.
- Regular cleaning, proper storage, and avoiding heat exposure can prevent cracks, whereas heavy grinding and poor maintenance accelerate deterioration.
- Using self-impression kits can simplify replacement and ensure a proper fit, especially when a guard needs urgent renewal but you want to avoid costly dental visits.
Table of Contents
- How to Tell If Your Night Guard Cracked or Just Has Surface Wear
- What Happens If You Keep Wearing a Cracked Guard
- Can a Cracked Night Guard Be Repaired?
- When Should You Replace Your Night Guard?
- How to Document Damage for Your Dentist or Lab
- Everyday Care That Keeps Guards From Cracking in the First Place
- Why We Think Replacement Beats Repair More Often Than People Assume
- Getting a Replacement Guard Without Starting From Zero
- Sources
How to Tell If Your Night Guard Cracked or Just Has Surface Wear
Not every mark on a night guard means the appliance is finished. Grab it under a bright light, dry it off completely (water hides hairline damage), and run your fingernail along any suspicious line. If your fingernail catches on a ridge or edge, that’s not surface wear.
Dentists generally sort damage into a few categories, and knowing which one you’re looking at changes what happens next.
- Crazing: networks of tiny surface cracks, usually white or cloudy, that don’t go through the material. These form from repeated cyclic loading as microscopic stress fractures accumulate night after night, and they’re often the earliest warning sign a guard is aging out.
- Surface chips: small missing bits at the edge or biting surface, usually from a hard bite-down moment or dropping the guard.
- Full-thickness splits: a crack you can see light through, or one that separates the guard into two flexing halves when you press on it.
- Perforations: an actual hole worn through the material, most common at pressure points for heavy grinders.
Beyond the visual check, pay attention to how the guard behaves in your mouth. If it suddenly needs more force to seat, feels loose where it used to snap into place, or your jaw clenching or tooth sensitivity has crept back after months of relief, that’s a functional red flag even if you can’t see obvious damage. A loose or hard-to-seat guard has often reached the end of its useful life regardless of how it looks.
Pro Tip: Photograph your guard against a plain background every few months. Side-by-side comparisons make it far easier to catch gradual thinning or new crazing that you’d otherwise miss day to day.
What Happens If You Keep Wearing a Cracked Guard
The risks aren’t hypothetical, and they compound the longer you keep using a compromised appliance. A guard sitting in your mouth for six to eight hours a night, under constant pressure from clenching or grinding, is exactly the wrong place for a structural weak point.
The most immediate danger is fragmentation. A crack that’s already propagated through the material can finish separating while you’re asleep, and a broken piece in your airway is a real choking hazard, not a remote one. Any visible crack is reason enough to replace the guard, specifically because of that fragment risk.
Sharp edges cause their own problems even without a full break. A jagged crack edge can cut your tongue, cheek lining, or gums over repeated contact, and those small wounds can turn into ulcers or, in the wrong circumstances, infected sores if bacteria get into the tissue.
A significant part of the human mouth’s total bacterial load lives in biofilm communities that cling to hard surfaces, and cracks give those communities exactly the sheltered microenvironment they need to thrive.
That matters here because cracks and fissures create pockets that your toothbrush and nightly rinse simply can’t reach. Dental device research backs this up directly: microbial communities on oral appliances persist in protected fissures and resist the kind of routine cleaning that keeps an intact guard sanitary. You’re not just wearing a broken piece of plastic. You’re wearing one that’s colonized.
There’s also a mechanical cost that’s easy to overlook. A night guard’s whole job is spreading your bite force evenly across the arch so no single tooth absorbs the full impact of grinding.
- Once material integrity fails, forces concentrate unevenly.
- That uneven load accelerates enamel wear on specific teeth.
- It can also strain the jaw joint, worsening TMJ symptoms the guard was meant to prevent.
A cracked guard, in other words, can quietly make your bruxism worse instead of managing it.
Can a Cracked Night Guard Be Repaired?
The short answer is sometimes, but the safe first move is always the same regardless of how minor the crack looks.
- Stop wearing it. Even a guard you plan to have repaired shouldn’t stay in nightly rotation once you’ve spotted damage.
- Rinse it under cool water and pat it dry. Skip hot water. Heat is one of the fastest ways to warp acrylic and make a small crack worse.
- Store it in a rigid case, not a pocket, bag, or loose on a nightstand where it can pick up more stress or debris.
- Photograph the damage from a couple of angles before you do anything else. You’ll want this if you end up discussing repair versus remake with your dentist over the phone.
What you should not do is reach for superglue, epoxy, or a heat-melt repair kit sold for eyeglasses or plastic housewares. These products contain chemicals that aren’t rated for oral use, and beyond the toxicity risk, they change the guard’s shape and thickness in ways that alter your bite. An appliance that no longer fits the way it was molded can actually shift teeth over time instead of protecting them.
Professional repair is a real option, but it depends heavily on what kind of damage you’re dealing with. A dental lab can sometimes patch a localized crack with an acrylic repair, or reline the guard if the fit has changed but the structure is sound. Both approaches work best on isolated, shallow damage caught early.
Full-thickness splits, significant thinning, or any distortion in the guard’s shape usually put repair off the table. At that point a lab is patching a structure that’s already failed rather than fixing a cosmetic flaw, and the honest recommendation is almost always a remake.
Pro Tip: If you’re a heavy grinder, ask your dentist about your bite force before assuming a repair will hold. Human bite force during sleep bruxism episodes can regularly exceed what’s applied during normal daytime chewing, which is exactly why patched cracks tend to reopen for people who grind hard.
When Should You Replace Your Night Guard?
Some signs are unambiguous. If you’re seeing any of the following, plan on replacement rather than repair:
- A crack that goes all the way through the material, letting light pass through
- A hole worn at a pressure point, common on molars for heavy grinders
- Persistent bad odor that survives a full cleaning cycle, a sign biofilm has taken hold in the material itself
- The guard requiring more force to seat than it used to, or feeling loose once in
- Jaw pain, headaches, or tooth sensitivity creeping back after months of being symptom-free
Lifespan varies a lot by material and how hard you grind. Soft or boil-and-bite style guards tend to run six to twelve months for someone with heavy bruxism, sometimes less. Hard, custom-fabricated guards typically last two to five years or longer, but that range depends entirely on grinding intensity and how well you care for the appliance in between.
A few habits shorten that timeline faster than people expect. Grinding intensity is the biggest factor, but heat exposure (a hot car, a dishwasher, boiling water for cleaning) softens acrylic and accelerates fatigue cracking. Poor storage, tossing it loose in a drawer or bag, invites chips from impact. And skipping regular cleaning lets buildup sit against the material longer, which can weaken it chemically over time. For a deeper breakdown of the signs worth watching, this guide on mouth guard replacement indicators covers the fit and comfort side in more detail.
How to Document Damage for Your Dentist or Lab
Walking into an appointment (or an online consultation) with clear evidence speeds up the whole triage process. Preserving the damaged guard itself, alongside photos, gives your provider the clearest picture of whether repair is realistic.
- Take close-up photos from two angles: straight down at the biting surface, and from the side to show crack depth. Place a coin or small ruler next to the guard for scale.
- Note when you first noticed it. Was it a gradual discovery, or did something specific happen, a hard clench, a drop on a tile floor, exposure to heat?
- Write down any new symptoms, like jaw soreness, tooth sensitivity, or the grinding itself feeling more intense lately.
- Prepare a short list of questions: Is this repairable or does it need a remake? What’s the cost difference? What’s the turnaround time? And critically, are your existing impressions or digital scans still usable, or do you need new ones taken?
That last question can save you an appointment entirely if your provider or a direct-to-consumer maker already has your impressions on file.
Everyday Care That Keeps Guards From Cracking in the First Place
Most cracked night guards didn’t fail overnight. They failed after months of small maintenance shortcuts that added up. A basic routine goes a long way toward avoiding an early replacement.

Rinse the guard under cool water every morning and give it a gentle brush with a soft toothbrush, no toothpaste, since most toothpaste is abrasive enough to scratch acrylic over time. Once a week, soak it in a dedicated denture or retainer cleaning tablet dissolved per the product’s instructions. This reaches bacteria and buildup that brushing alone misses, particularly in early crazing lines before they widen into real cracks. A consistent daily and weekly cleaning routine is genuinely one of the cheapest ways to extend a guard’s working life.
Heat is the enemy you don’t think about until it’s too late. Never run a night guard through the dishwasher, never rinse it with hot tap water, and never leave the case in direct sunlight or a hot car in summer. Acrylic softens well below boiling temperatures, and a warped guard doesn’t fit right even if it never technically cracks.
Pro Tip: Keep the storage case in the same spot every night, ideally away from a bathroom heat vent or window ledge. The single biggest cause of accidental cracks isn’t grinding, it’s getting stepped on or crushed in a bag because it wasn’t in its case.
Material choice matters too, and it’s worth a real conversation with your dentist rather than guessing. Heavy grinders generally hold up better with a hard acrylic guard built for high-force wear, while people with milder, occasional grinding sometimes do fine with a softer or hybrid design. Bruxism intensity also affects how appliances interact with existing dental work, something worth flagging if you have veneers or crowns, since grinding forces and restoration wear are closely linked.
Why We Think Replacement Beats Repair More Often Than People Assume
Most people want to save the guard they already have, and that instinct is understandable given what custom appliances cost. But once a crack has actually formed, you’re no longer protecting your teeth the way the guard was designed to. You’re managing a compromise, and compromises in your mouth every night for months don’t age well.
Our position is simple: if there’s any structural crack, stop wearing it and get a professional opinion before the next bedtime. When replacement is the right call, using FDA-approved materials made under lab supervision and keeping your original impressions on file means a new guard doesn’t have to mean starting over from scratch.
— Clear
Getting a Replacement Guard Without Starting From Zero
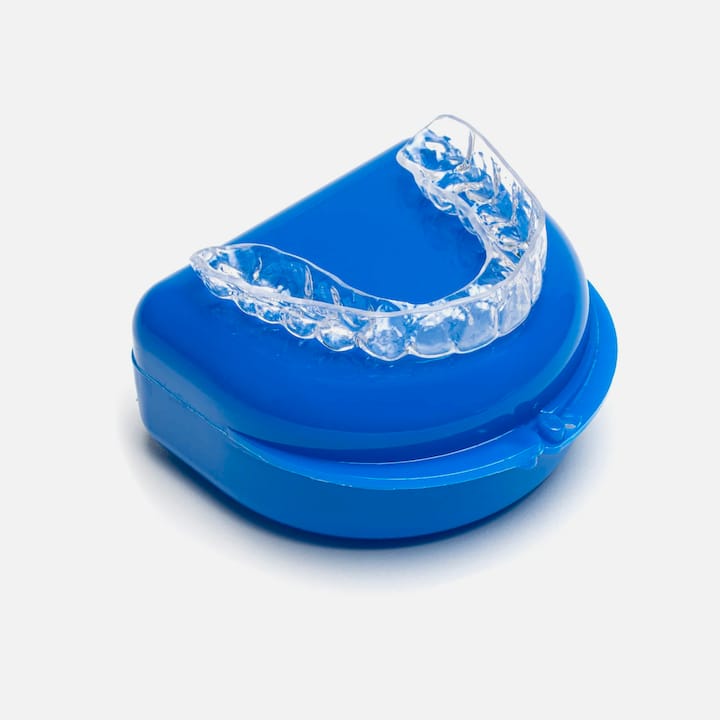
If your dentist confirms your current guard is done, replacing it doesn’t have to mean another round of costly office visits and impression appointments. Clearretain builds custom night guards and retainers from self-impression kits you complete at home, using the same FDA-approved materials and lab oversight you’d expect from a traditional practice, at a fraction of the typical cost.

The process is straightforward: order a self-impression kit, follow the guided instructions to capture an accurate mold, ship it back, and a lab technician fabricates your custom appliance. If you’ve ordered from us before, your impressions stay on file, so a replacement guard skips the impression step entirely next time around.
Product fit depends on what you’re replacing. Heavy grinders who need maximum durability usually do best with the Hard Night Guard. If you only need coverage on one arch, the Upper Retainer-Night Guard handles single-arch cases efficiently. For anyone replacing a guard that covered both upper and lower arches, the full night guard collection covers dual-arch options at every price point. Start with a self-impression kit today and have your new guard on the way well before your cracked one becomes a real problem.
This article is general information, not a substitute for advice from a qualified doctor. Consult a qualified healthcare professional about your own circumstances before acting on anything here.
Sources
- How Often Should You Replace Your Night Guard? — Selkirk Crossing Dental Centre
- When to Replace a Mouthguard or Night Guard | Minnetonka Dental
- Mouth microbes — NIH News in Health
- PMC article on oral biofilms