


Instructions
To ensure that your upper and lower impressions are deep and accurate enough for us to make your new retainers, read through all of the instructions before you begin the impression taking process! After you've read all of the instructions, please watch our video guide and carefully follow each step as shown below:


Preparation
- Before you begin, wash your hands, then brush and floss your teeth.
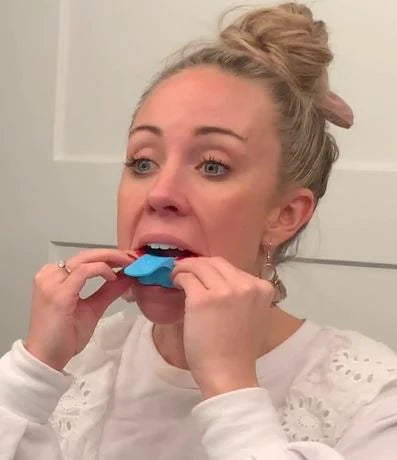
- Test the three different tray sizes in your mouth before you do anything else.
NOTE: Use the largest tray that can fit comfortably in your mouth. Pulling your cheek to the side with a "hooked finger" will make it easier to fit larger trays. - You will know which size is best when your teeth can fit inside the tray without hitting the inner walls. If the tray is too narrow for your mouth, your teeth will scrape the side walls of the tray, making it unusable.
Open & Mix Putty
- Remove ONE full white putty and ONE full colored putty from their containers. IMPORTANT: DO NOT ATTEMPT TO TAKE UPPER AND LOWER IMPRESSIONS TOGETHER. ONLY MAKE ONE UPPER OR LOWER IMPRESSION AT A TIME.
- Set a timer for 25 SECONDS and press start.
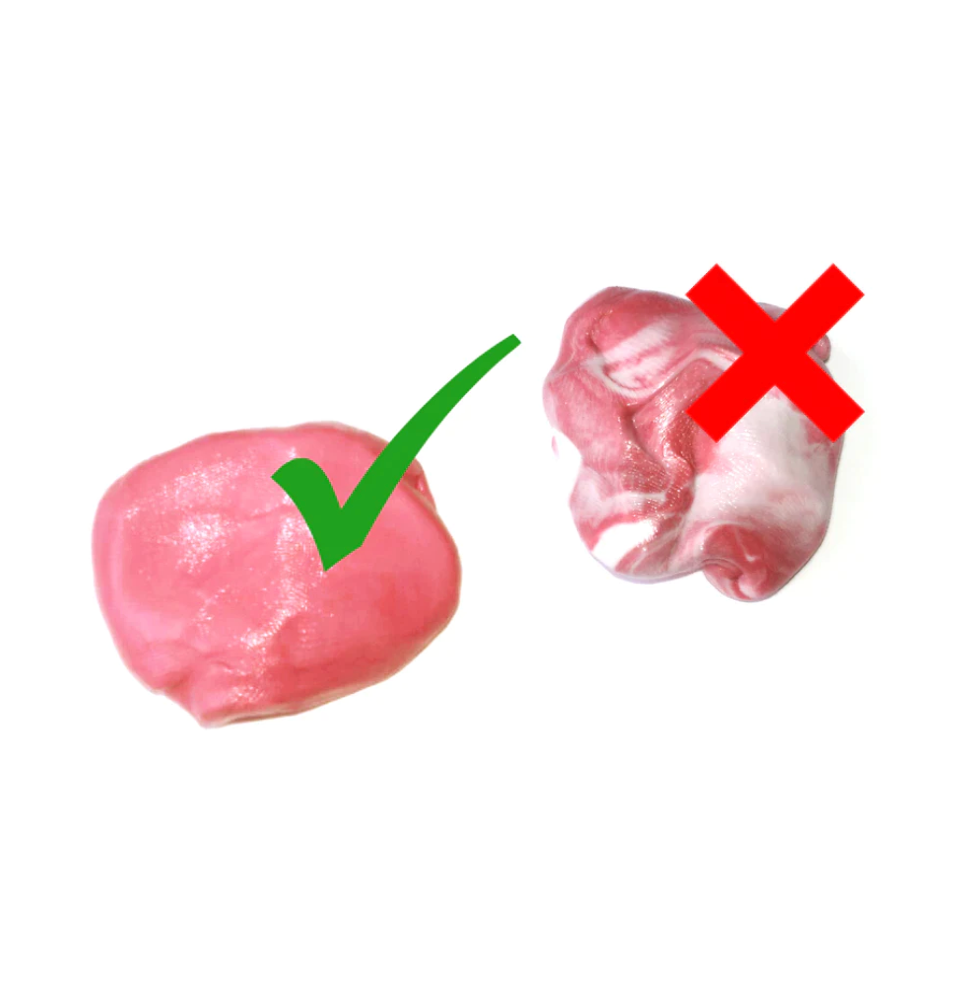
- Immediately begin mixing the white and colored putty together vigorously until the two putties become a solid color.
WARNING: Don't mix for longer than 30 seconds. After (40-45) seconds, the putty will start to harden, making it difficult to take an impression.


Shape & Place Putty in Tray
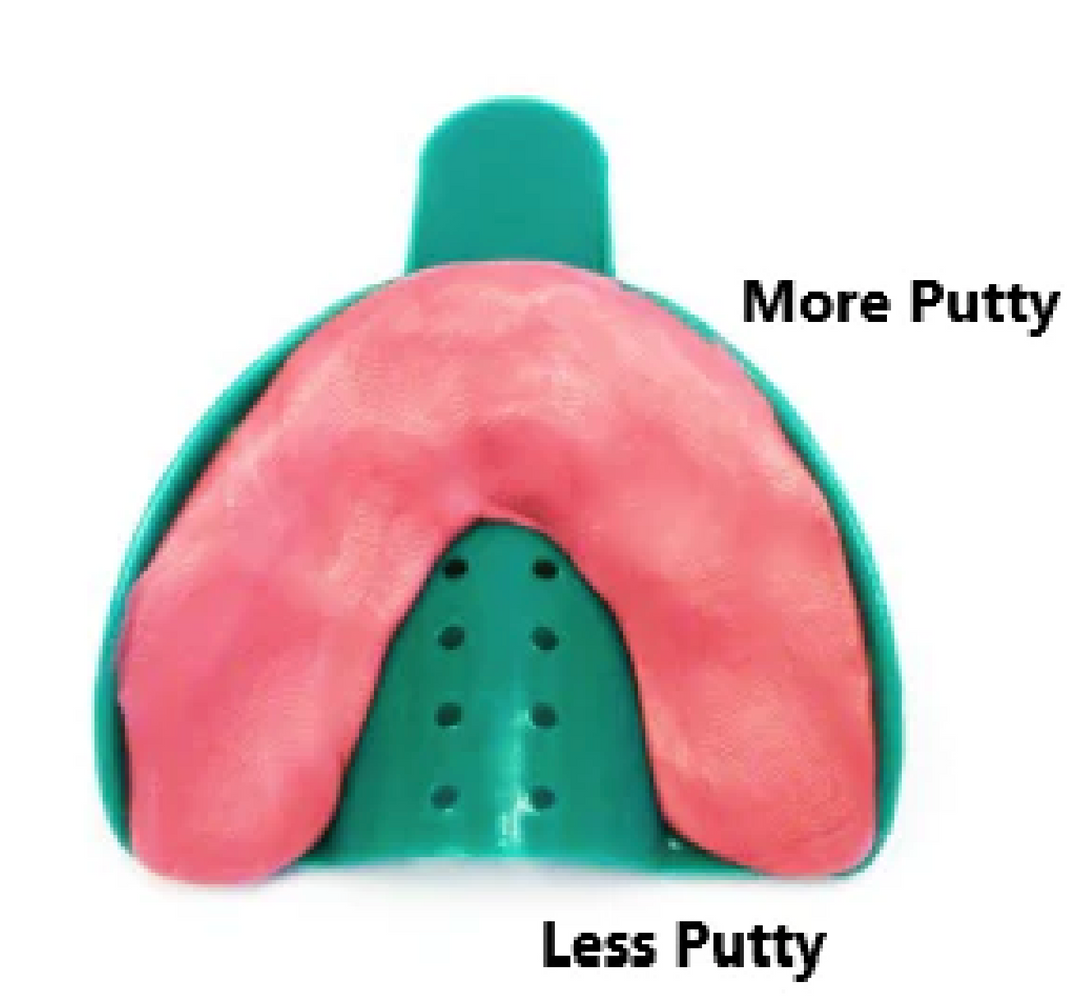
- Immediately after mixing the putty, roll it into a ball and then make it into a log shape.
- Bend the log-shaped putty so it looks like an "arch".
- Place "arch"-shaped putty inside the tray with more in the front and less putty tapered off towards the back end.
Take Your Impression
UPPER IMPRESSION
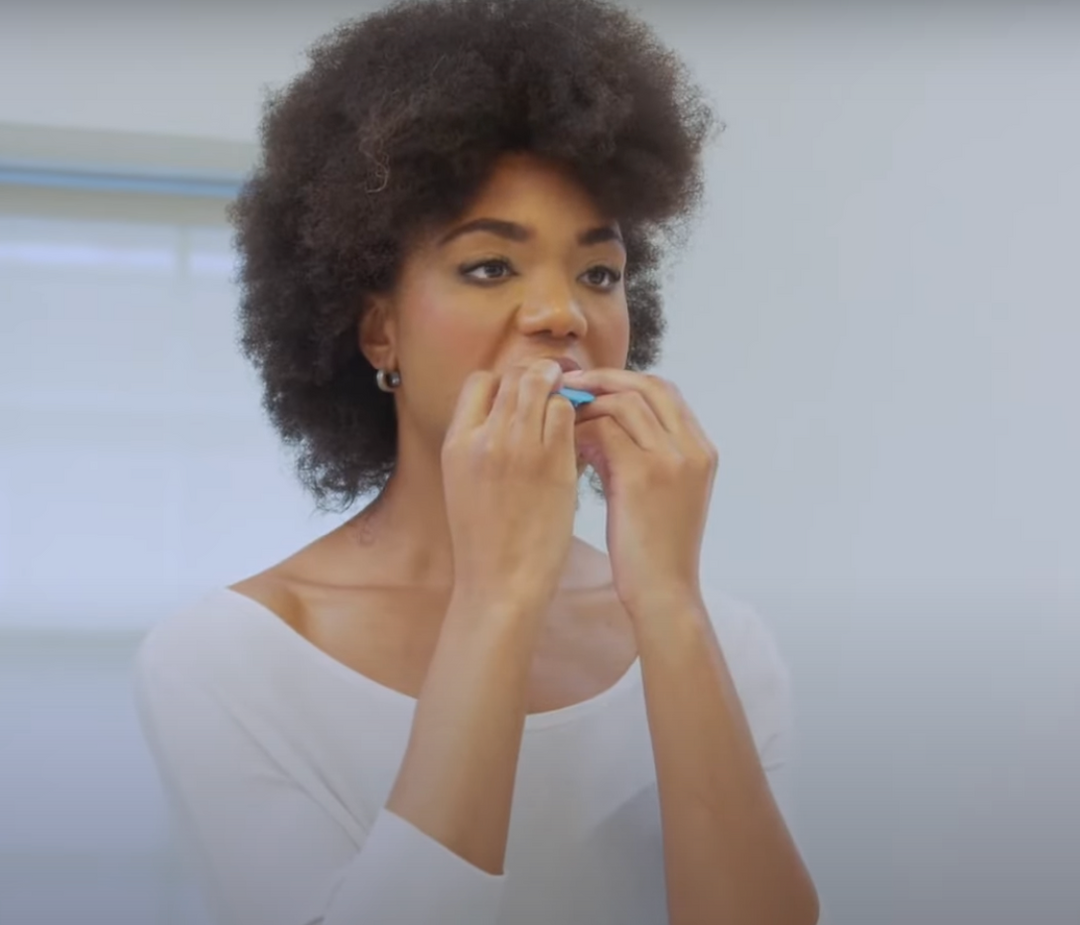
- Put the tray with putty into your mouth and use a mirror to center the tray underneath your upper teeth.
- Make sure there are at least 2-3 mm of space between your front teeth and the inside wall of the impression tray to avoid scraping the plastic on the way in. CAUTION: DO NOT bite down into the putty!!! Place your thumbs underneath the tray (your right thumb along the "right underside" of the tray and your left thumb along the "left underside" of the tray).
- Once the tray is resting in position, press it straight up with one single push, as deeply and evenly as possible. The putty should completely cover your teeth, passing the gum-line.
- Leave one of your thumbs under the tray to stabilize it while using the other hand to pull your upper lip up and over the edge of the tray.
- Using that same free hand, press your finger tips against the area between your lip and nose (mustache area) to spread the putty around your gums. (From outside of your mouth).
- Next, set a timer for 5 minutes and place both thumbs under the tray. Hold them there to stabilize the tray for the duration of the hardening process (5 minutes)
- NOTE: You will likely produce extra saliva and even drool while waiting for the putty to harden. We suggest having paper towels or tissues present.


LOWER IMPRESSION
- Put the tray with putty into your mouth and use a mirror to center the tray above your lower teeth.
- Make sure there are at least 2-3 mm of space between your front teeth and the inside wall of the impression tray to avoid scraping the plastic on the way in.
- DO NOT bite down onto the tray with your upper teeth!!! Place your fingers on top of the tray (your right index and middle fingers along the "top right side" of the tray and your left index and middle fingers along the "top left side" of the tray).
- Once the tray is resting in position, press it straight down with one single push, as deeply and evenly as possible. The putty should completely cover your teeth, passing the gum-line.
- Pull your bottom lip down and then up over the edge of the tray.
- Leave one hand on the tray to stabilize it while using the other hand to pull your lower lip down and over the edge of the tray.
- Using that same free hand, press your finger tips against the area between your bottom lip and chin to spread the putty around your gums. (From outside of your mouth).
- Next, set a timer for 5 minutes and place your index and middle fingers (both hands) on top of the tray. Hold them there to stabilize the tray for the duration of the hardening process (5 minutes)
- NOTE: You will likely produce extra saliva and even drool while waiting for the putty to harden. We suggest having paper towels or tissues present.


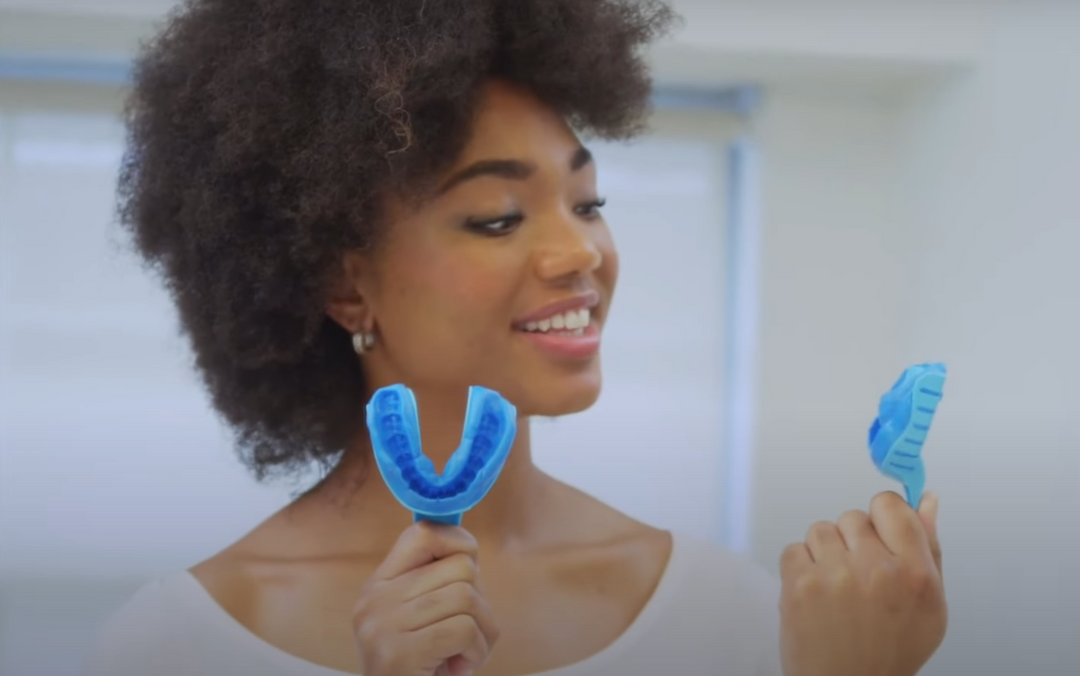
Remove Impressions
- Gently press against an area of putty with your fingertip to see if it has fully hardened.
CAUTION: If the putty is still "squishy" to the touch, wait an additional 30-40 seconds. - Grip the top and bottom of the tray between your thumbs and fingers (don't pull on the tray handle). Gradually pull downward on the upper tray or push upward on the lower tray (there will be some resistance) until it pops off of your teeth.
NOTE: Do NOT remove the impression too soon. If the putty is not fully hardened it will become distorted as you remove the tray and will be unusable.
Inspect Your Impressions
- Rinse your impression out with water and then use a paper towel to remove any excess water and saliva.
- Before sending in your impression, take a moment to evaluate the overall quality. WARNING: DO NOT REMOVE THE PUTTY FROM THE IMPRESSION TRAY UNLESS YOU HAVE TO REDO THE IMPRESSION. WE CANNOT USE THE IMPRESSION IF IT HAS BEEN TAKEN OUT OF ITS TRAY.
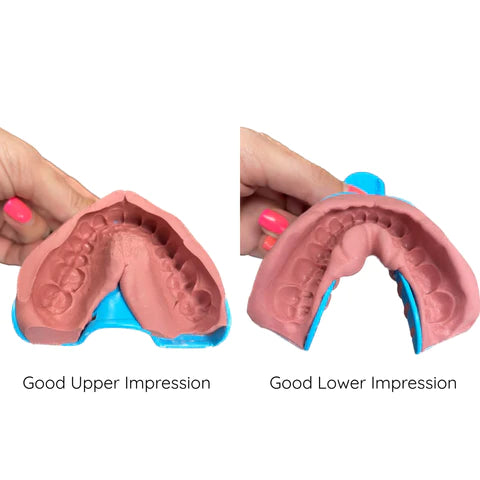
- Your impression should capture the entirety of your teeth as well as the gum-line.


Send Pictures for Approval
- Take a picture of your dry impression at a 45-degree angle with a flash so we can see every detail (like the example pictures shown above).
- Send your picture(s) via email to info@clearretain.com (Please also include your name and order number).
- WAIT FOR OUR APPROVAL BEFORE SHIPPING YOUR PACKAGE TO US. This is to save you time and money. WARNING: If you do not send pictures for approval and the impression is not usable, you will have to purchase a remake kit for a new impression. NOTE: The retainer we make for you will only be as good as the impression you send in.
Shipping Your Impressions
- Seal your impression in one of the ziplock bags that the putty or trays were in.
- Place the bagged impression(s), the information sheet (size of a credit card), and any unused trays or impression putty into the return box. NOTE: Don't peel the information sheet sticker off of its backing! Simply place it inside the box with the other materials. We will use the sticker here at our lab once your package arrives.
- Tape the box shut.
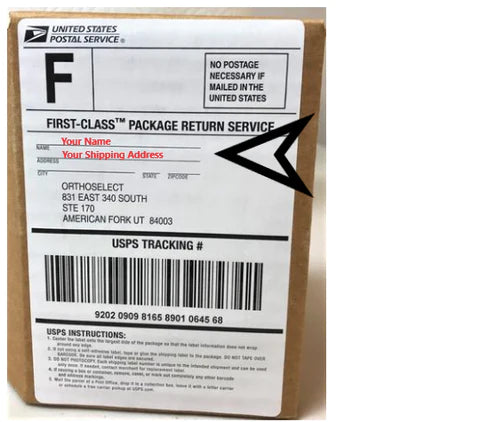
- Write your name and shipping address at the top of the prepaid return label located on the box.
- IF YOUR COMPLETED RETAINERS NEED TO BE SHIPPED TO ANY ADDRESS OTHER THAN THE PROVIDED SHIPPING ADDRESS ON YOUR ORDER, PLEASE CONTACT US RIGHT AWAY TO ENSURE A CORRECT AND TIMELY DELIVERY!
- Drop your package off at your local post office (USPS)

Instructions
Taking Impressions
Watch the video for detailed instructions on how to properly take your impressions at home.
FAQs
In most cases, your retainer(s) will arrive in about 12 to 16 business days (depending on your location) from the time you place your order to the time that you receive them. Remember it is important to take your teeth impressions and ship them back to ClearRetain as soon as possible, as this is the main factor that determines how quickly your retainers are completed and returned.
- Impression putty
- Impression trays
- Pre-paid return shipping label
- Plastic baggies
- First Class Mail return shipping box
- Online video tutorial and written instructions