

How Custom Impression Guards Are Made: Step-by-Step
Custom impression guards, the industry term for custom-fabricated mouthguards and occlusal splints, follow a consistent manufacturing path regardless of whether a clinic or a direct-to-consumer lab produces them: an accurate impression of the dentition is captured, converted into a working model (physical or digital), formed or printed into the guard shell using one of three primary fabrication methods, then trimmed, polished, and adjusted for occlusal balance before delivery.
The three fabrication routes are:
- Vacuum-forming (thermoforming): a heated laminate is drawn over a stone or resin model under suction, producing a lightweight, cost-effective shell.
- Pressure-lamination: multiple laminate layers are bonded under heat and positive pressure, yielding higher impact resistance for contact sports.
- CAD/CAM + 3D printing or CNC milling: a digital scan drives software design and automated manufacturing, enabling precise thickness control and stored digital records for reorders.
All three routes rely on FDA-classified biocompatible materials and, when done correctly, follow dimensional standards published by dental and sports-dentistry professional bodies. The method you choose, or that your lab chooses for you, determines fit accuracy, impact protection, turnaround time, and cost.
Key Takeaways
Impression quality is the single most controllable variable in custom guard fabrication: a flawed impression produces a flawed guard regardless of how good the forming equipment is.
| Point | Details |
|---|---|
| Impression quality first | Any void or blurred margin in the impression reproduces in the finished guard and causes a poor fit. |
| Match method to use case | Pressure-lamination meets the 3–4 mm labial thickness standard for contact sports; vacuum-forming suits night guards. |
| Digital records save time | Stored STL files allow reorders without a new impression, reducing cost and turnaround on replacements. |
| Post-processing is non-negotiable | 3D-printed guards require IPA washing and full UV post-curing to achieve biocompatibility for intraoral use. |
| Clearretain’s workflow | Clearretain offers FDA-approved sports, hard-soft, and hard night guards via self-impression kits with stored digital records for reorders. |
Table of Contents
- How are custom impression guards made, step by step?
- How are dental impressions captured for a custom guard?
- From impression to working model: how the cast is produced
- What are the main fabrication methods for custom guards?
- How do digital CAD/CAM and 3D printing workflows produce guards?
- Finishing, occlusal adjustment, and fit verification
- What materials are used in custom guards, and are they safe?
- How long does fabrication take, and what does it cost?
- How do self-impression kits work, and how accurate are they?
- Why process control matters more than most people realize
- Clearretain’s self-impression workflow makes custom guards accessible
- Sources
How are custom impression guards made, step by step?
The manufacturing sequence has six distinct stages. Each one feeds directly into the next, so a flaw at stage two shows up as a poor fit at stage six.
-
Consultation and diagnosis (Day 1, 15–30 minutes in-office or online): The clinician or consumer selects the guard type based on use case: a sports mouth guard for contact athletes, a hard-soft night guard for moderate bruxism, or a hard night guard for heavy grinders. This step determines which fabrication method and material are appropriate.
-
Impression capture (15–45 minutes, in-office or at home): An alginate, polyvinyl siloxane (PVS), or digital intraoral scan records the exact arch anatomy. Home-kit users complete this step themselves with a pre-measured tray and impression material.
-
Working model production (2–24 hours, lab): The impression is poured in dental stone, vacuum-mixed to eliminate bubbles, and allowed to cure. Digital workflows skip this step by generating an STL file directly from the scan.
-
Fabrication (30 minutes to several hours, lab): The model enters the forming machine. Vacuum-forming takes roughly 30 minutes per arch; pressure-lamination adds time for each bonded layer; 3D printing can run 2–6 hours per build plate depending on printer and resin.
-
Finishing and occlusal adjustment (30–60 minutes, lab or clinic): The guard is trimmed, polished, and checked against articulating paper for even occlusal contacts. Sports guards receive flange shaping; night guards receive selective grinding to prevent TMJ displacement.
-
Delivery and care instruction (same-day or shipped, 1–5 business days): The finished appliance is delivered with cleaning and storage instructions. Labs using digital workflows store the STL file, enabling reorders without a new impression.
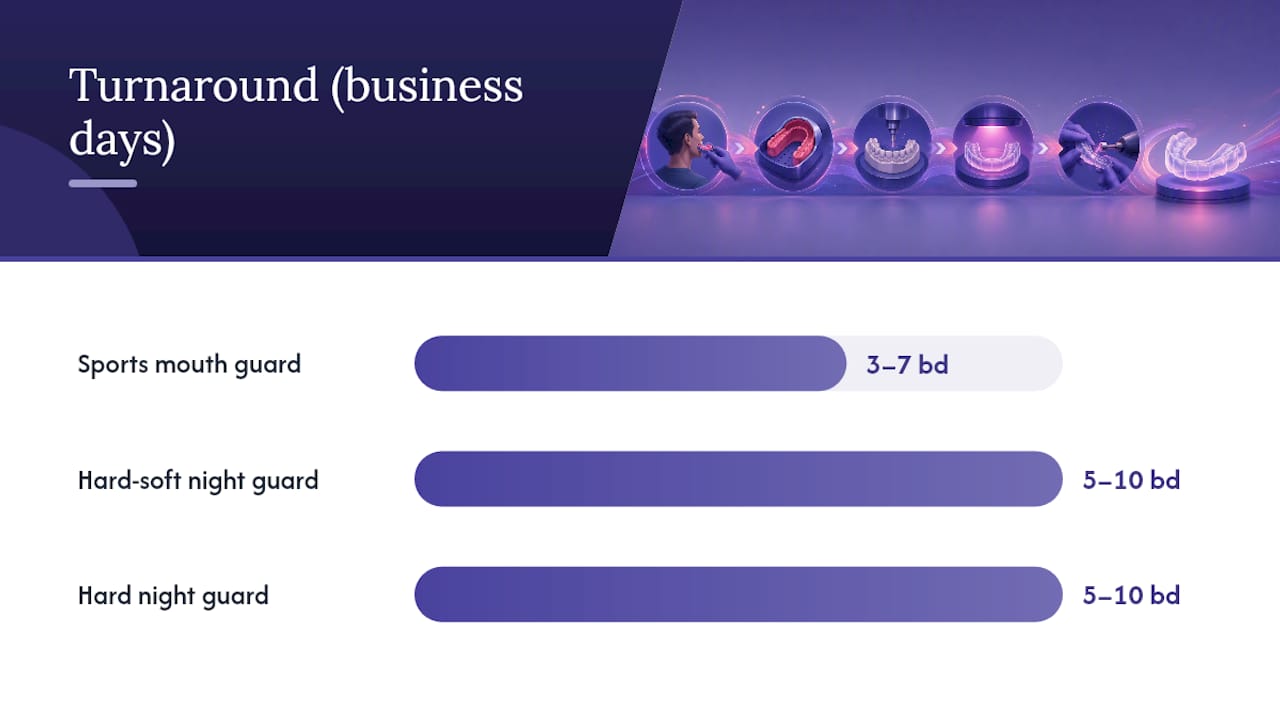
The table below maps each guard type to its typical workflow path.
| Guard type | Preferred fabrication method | Typical total turnaround |
|---|---|---|
| Sports mouth guard | Pressure-lamination (multi-layer) | 3–7 business days |
| Hard-soft night guard | Vacuum-forming (dual-layer laminate) | 5–10 business days |
| Hard night guard | Vacuum-forming or CAD/CAM | 5–10 business days |
How are dental impressions captured for a custom guard?
The impression is the single most consequential step in the entire process. A blurred margin or a void in the impression reproduces exactly in the finished guard.
Alginate impressions
Alginate is the most common impression material in general dentistry: it mixes quickly, sets in 2–3 minutes, and costs very little. The trade-off is dimensional instability. Alginate begins to distort within minutes of removal from the mouth, so the stone model must be poured promptly after removal. For guard fabrication, alginate works well when the lab is on-site or the impression is poured immediately. It is the material used in most home impression kits.
PVS (polyvinyl siloxane) impressions
PVS, also called elastomeric impression material, offers significantly better dimensional stability. A poured PVS impression can sit for hours or even a day without meaningful distortion, which makes it the preferred choice when impressions are shipped to a remote lab. Clinicians also use PVS when the case requires high accuracy, such as a hard acrylic night guard where occlusal contacts must be precise.
Digital intraoral scanning
Intraoral scanning eliminates impression material entirely. A wand-shaped scanner captures a point cloud of the arch in real time, and the software stitches it into a 3D model within seconds. The clinician can spot motion blur, undercuts, or missed anatomy on-screen before the patient leaves the chair. According to the Academy for Sports Dentistry, digital scanning reduces patient discomfort, speeds workflow, and allows immediate quality control of impression anatomy, cutting remake rates compared with tray-and-putty methods. The limitation is cost: scanner hardware runs into the tens of thousands of dollars, which is why most direct-to-consumer labs still rely on physical impression kits.
Avoiding the most common impression errors
- Tray size: an oversized tray allows the material to pool away from the teeth; undersized trays cause the tray to contact the teeth before the material sets.
- Mixing time: alginate mixed too long begins to set in the bowl; mixed too briefly, it sets unevenly.
- Movement during setting: any patient movement during the 2–3 minute set time creates streaks or voids at the gingival margin.
- Pour timing: for alginate, delay beyond 60 minutes risks a distorted cast.
Pro Tip: Wrap an alginate impression in a damp paper towel and seal it in a plastic bag if you cannot pour immediately. This buys you 15–20 extra minutes without significant distortion.
From impression to working model: how the cast is produced
A precise master model is critical. Any voids, bubbles, or blurred margins in the impression reproduce in the cast and cause a poor-fitting guard, a point reinforced by digital lab fabrication research. Here is the standard physical workflow:
- Inspect the impression for voids, tears, or pulled margins before committing to a pour.
- Vacuum-mix dental stone (Type III or IV) to eliminate air bubbles. Hand-mixing introduces porosity that weakens the model surface.
- Vibrate the stone into the impression starting at one end of the arch, allowing material to flow around each tooth before filling the tray.
- Allow full cure — typically 45–60 minutes at room temperature before separating the model from the impression.
- Trim the model base flat and parallel to the occlusal plane. A stable, flat base is not cosmetic: it directly affects how the laminate adapts during vacuum or pressure forming.
- Check for undercuts at the gingival margin and block them out with wax if they would lock the finished guard onto the model.
- Dry the model completely before forming. Moisture trapped under a heated laminate causes bubbling and thin spots.
For digital workflows, the intraoral scan exports as an STL file. The lab either works directly in CAD software or 3D-prints a resin model to use in a traditional forming machine. Printing a resin model from a scan adds roughly 2–4 hours but gives the technician a physical object to inspect before forming.
Key quality checks at this stage:
- No visible porosity on tooth surfaces
- Gingival margins sharp and unbroken
- Base flat to within 1 mm across the arch
- Model fully dry before entering the forming machine
What are the main fabrication methods for custom guards?
Three primary fabrication routes cover the vast majority of custom guard production: vacuum-forming, pressure-lamination, and CAD/CAM manufacturing.
Vacuum-forming (thermoforming)
The model sits on a perforated platform inside a vacuum-forming unit. A sheet of thermoplastic laminate, typically ethylene-vinyl acetate (EVA), is clamped above a heating element and softened until it sags slightly. The platform rises to meet the softened sheet, and a vacuum pump draws air out from below, pulling the laminate tightly over every surface of the model.
Step-by-step:
- Preheat the forming unit and select laminate thickness (1.5 mm for thin night guards, 3–4 mm for sports guards).
- Clamp the laminate sheet and heat until it sags 1–2 cm.
- Raise the model into the softened sheet and activate the vacuum immediately.
- Hold vacuum for 20–30 seconds, then allow the laminate to cool on the model for 2–3 minutes before releasing.
- Trim the guard 1–2 mm below the gingival margin using scissors or a trimming wheel, then flame-polish the edges.
Vacuum-forming produces a lightweight, comfortable guard at low equipment cost. Its limitation for high-impact sports is that a single-layer vacuum-formed guard offers less shock absorption than a multi-layer pressure-laminated one.
Pressure-lamination
Pressure-laminated guards are built in layers. A soft inner layer (typically 3 mm EVA) is formed first, then a harder outer layer is bonded over it under heat and positive pressure in a specialized pressure pot or laminating machine. Clinicians often prefer heat/pressure machines or dry-model techniques for a more intimate fit than simple wet-model vacuum adaptation. The result is a guard that absorbs impact through the soft core while the rigid outer shell distributes force across the arch.
Published position statements recommend multi-layer designs and specify minimum labial thicknesses of 3–4 mm at the central incisors for high-risk contact sports, with peripheral extension to the mucobuccal fold. For contact sport athletes, pressure-lamination is the fabrication method that meets those dimensional standards most reliably.
Vacuum vs. pressure-lamination: when to choose each
| Feature | Vacuum-forming | Pressure-lamination |
|---|---|---|
| Impact resistance | Moderate (single layer) | High (multi-layer bonded) |
| Fit intimacy | Good | Very good (dry-model technique) |
| Bulk/thickness | Thinner possible | Slightly bulkier |
| Equipment cost | Low | Moderate to high |
| Best for | Night guards, low-contact sports | Contact sports, high-impact use |
| Typical laminate | Single EVA sheet | Multilayer EVA or EVA/copolymer |
How do digital CAD/CAM and 3D printing workflows produce guards?
The digital path starts where the intraoral scan ends. The STL file moves into CAD software, where a technician designs the guard virtually, setting occlusal contacts, adjusting thickness distribution, and defining the peripheral extension before a single piece of material is touched.
Digital workflows enable targeted CAD adjustments, STL handoff to manufacturing, and virtual QC that reduce remakes and support stored digital records for reorders. That stored file is what allows a patient to reorder a replacement guard without returning for a new impression.
Materials for 3D-printed guards
The Formlabs application guide for splints and occlusal guards identifies two primary resin options:
- Dental LT Clear Resin: a rigid, fracture-resistant resin suited for hard night guards and occlusal splints requiring long-term intraoral use.
- Dental LT Comfort Resin: a more flexible formulation that prioritizes patient comfort, closer in feel to a dual-layer thermoformed guard.
Both are biocompatible resins cleared for long-term intraoral contact. PMMA (polymethyl methacrylate) is a third option used in CNC-milled guards, offering high rigidity and proven long-term biocompatibility.
Post-processing checklist for 3D-printed guards
3D printing requires material-specific manufacturing steps: dedicated resin tanks and build platforms, washing in isopropyl alcohol, and precise post-curing to achieve biocompatibility and mechanical properties. Skipping or shortening any of these steps leaves uncured resin in the appliance, which is a biocompatibility risk.
- Remove supports carefully to avoid surface tears at attachment points.
- Wash in fresh isopropyl alcohol (IPA) for the manufacturer-specified time, typically 10–20 minutes.
- Post-cure under UV light at the correct wavelength and duration per the resin datasheet.
- Inspect for print artifacts, layer lines at margins, and thin spots using calipers.
- Polish occlusal and labial surfaces to a smooth finish before delivery.
Recommended parameters
Lab technicians specify offsets between 0.01 mm and 0.10 mm based on material stiffness and desired snugness. Smaller offsets produce tighter fits but increase the risk of seating difficulty in rigid resins.
| Parameter | Typical range | Notes |
|---|---|---|
| Model offset | 0.01–0.10 mm | Smaller = tighter fit; rigid resins need more clearance |
| Occlusal thickness | 3.0 mm minimum | Higher for bruxism or contact sports |
| Palatal/lingual wall | 1.5 mm minimum | Thinner walls risk fracture under load |
| IPA wash time | 10–20 minutes | Per resin manufacturer datasheet |
| Post-cure time | Per datasheet | Under-curing leaves biocompatibility risk |
Finishing, occlusal adjustment, and fit verification
A guard that fits the model perfectly can still fail in the mouth. Finishing is where fabrication quality becomes clinical quality.
Fit checklist before delivery
- Retention test: the guard should seat fully and resist removal with moderate finger pressure. Rocking on one side indicates a distorted model or uneven forming.
- Soft-tissue clearance: flanges must not impinge on the frenum, buccal mucosa, or gingival tissue. Run a finger along the full periphery with the guard seated.
- Speaking and breathing: the patient should be able to speak clearly and breathe without restriction. Excessive bulk in the palatal area is the most common cause of speech interference.
- Occlusal contacts: place articulating paper between the arches and have the patient close naturally. Contacts should be even across the arch. Heavy marks on one or two teeth indicate a high spot that needs selective grinding.
- Margin inspection: hold the guard up to light and check for thin spots, rough edges, or untrimmed flash at the periphery.
Occlusal equilibration steps
Custom guards combine precise impressions, laboratory fabrication, and occlusal equilibration to distribute forces evenly and protect the TMJ and dentition. Equilibration is not optional for night guards: an unbalanced contact pattern can shift the mandible and worsen TMJ symptoms.
- Mark contacts with articulating paper (40 micron or thinner for accuracy).
- Reduce high spots with a fine carbide bur or acrylic trimming wheel.
- Re-polish any ground surfaces with pumice and a rag wheel.
- Re-check contacts until marks are even across the arch.
Red flags that require a remake
- Guard rocks on the model or in the mouth (distorted impression or cast)
- Visible thin spots less than 1 mm on the occlusal surface
- Soft-tissue impingement that cannot be corrected by trimming without compromising retention
- Untidy or sharp margins that cannot be polished smooth
Pro Tip: Always check occlusal contacts with the guard seated on the patient, not just on the model. Soft tissue compresses under load, and contacts that look balanced on a stone model sometimes shift when the guard is actually in the mouth.
What materials are used in custom guards, and are they safe?
Material selection drives both performance and safety. The wrong material for a use case produces a guard that either wears out too fast or is uncomfortable enough that the patient stops wearing it.
Material properties by type
- EVA (ethylene-vinyl acetate): the workhorse of thermoformed guards. Soft, comfortable, and easy to form. Available in multiple durometers; softer grades suit night guards, firmer grades suit sports use.
- pEVA (pressure-formed EVA): the same polymer processed under positive pressure, yielding higher density and better impact resistance than vacuum-formed EVA.
- COC (cyclic olefin copolymer): a stiffer, more transparent laminate used in premium hard-soft combinations. Offers good dimensional stability and a cleaner appearance.
- PMMA (polymethyl methacrylate): the standard for CNC-milled hard night guards. High rigidity, excellent long-term biocompatibility, and a smooth, polishable surface.
- Dental LT resins (SLA/DLP): biocompatible photopolymers for 3D-printed guards. Rigid or flexible profiles available; require full post-processing to achieve intraoral safety.
For a detailed breakdown of how these materials compare in real-world use, the mouth guard materials comparison guide covers comfort, durability, and cost trade-offs across guard types.
Regulatory and biocompatibility notes
FDA-classified dental appliances must use materials that have passed biocompatibility testing per ISO 10993. For 3D-printed guards, this means using resins specifically cleared for long-term intraoral contact, not general-purpose engineering resins. When ordering from a lab, ask for the material’s FDA 510(k) clearance number or ISO 10993 test report. A lab that cannot produce this documentation is a lab to avoid.
Dedicated resin tanks and build platforms matter for printed guards. Cross-contamination between resin types can compromise biocompatibility, even when both resins are individually cleared.
Maintenance and care
Proper care extends guard life and prevents bacterial buildup. Sports guard hygiene follows the same principles as night guard care:
- Rinse with cool water immediately after removal. Hot water can warp thermoplastic guards.
- Brush gently with a soft toothbrush and mild soap. Avoid toothpaste, which is abrasive enough to scratch the surface.
- Store in a vented case to allow drying. A sealed, moist case grows bacteria.
- Inspect monthly for cracks, thinning, or distortion. A guard that has thinned to less than 1 mm on the occlusal surface should be replaced.
How long does fabrication take, and what does it cost?
Timeline and cost vary significantly by method and whether the work is done in-office, at a remote lab, or through a direct-to-consumer service.
| Stage | In-office/clinic | Remote lab | Digital/DTC |
|---|---|---|---|
| Impression capture | 15–30 min | 15–45 min (home kit) | 15–30 min (home kit) |
| Model production | 1–2 hours | 24 hours | STL only (no model) |
| Fabrication | 30–60 min | 1–3 days | 2–6 hours (print) |
| Finishing | 30–60 min | 1–2 days | 30–60 min |
| Shipping/delivery | Same day | 3–7 days | 3–7 days |
| Total typical | Same day to 2 days | 5–10 business days | 5–10 business days |
Cost ranges vary by guard type, material, and provider. Clinic-made custom guards typically run higher due to chair time and overhead. Direct-to-consumer labs using self-impression kits can deliver comparable materials at significantly lower cost by removing the office visit markup. Factors that increase cost and turnaround include rush fabrication requests, advanced materials such as printed resins, and remakes caused by poor impressions.
How do self-impression kits work, and how accurate are they?
Self-impression kits place the alginate impression step in the consumer’s hands. The kit includes a pre-sized tray, pre-measured impression powder, a mixing container, and detailed instructions. The consumer mixes the material, loads the tray, seats it over the upper or lower arch, holds it still for 2–3 minutes, and removes it. The impression is then mailed to the lab.
Step-by-step home impression checklist
- Read all instructions before opening any material.
- Select the correct tray size by trying the empty tray in your mouth. It should cover all teeth without touching them.
- Mix the impression powder with the measured amount of cool water until smooth, about 45–60 seconds.
- Load the tray evenly and seat it firmly over the arch, centering it so the tray handle aligns with the midline.
- Hold completely still for the full set time, typically 2–3 minutes. Any movement creates streaks.
- Remove with a firm, straight pull. Do not rock the tray side to side.
- Inspect the impression immediately. Every tooth should be clearly defined with no voids at the gingival margin.
- Package and ship the same day if possible. If shipping the next day, store the impression in a sealed bag.
Accuracy and limitations
Home impressions are sufficient for most night guard and sports guard fabrication when the instructions are followed carefully. The main accuracy risk is movement during setting, which creates a blurred margin that the lab cannot correct. Common fitting errors traced back to home impressions almost always involve tray movement or incorrect set time.
Intraoral scanning or a clinic impression is preferable when:
- The patient has significant crowding or deep undercuts that make tray removal difficult.
- A hard acrylic night guard requires precise occlusal equilibration before delivery.
- A previous home impression was rejected by the lab.
How labs handle home impressions
Labs inspect every incoming impression before pouring. Common rejection reasons include voids at the gingival margin, a torn or pulled impression, or evidence of tray movement. Most labs contact the customer and send a replacement kit rather than fabricating from a flawed impression, since a poor cast produces a guard that will not fit and requires a remake anyway.
Why process control matters more than most people realize
The most common cause of a remake is not a bad impression material or an outdated machine. It is a skipped step: a model poured too late, a laminate formed on a damp model, an occlusal check done on the model instead of in the patient’s mouth. Each of those shortcuts costs more time than the step itself would have taken.
From a fabrication standpoint, the balance between cost and accuracy is not a straight trade-off. A cheaper impression material is fine if the pour happens on time. A less expensive vacuum-forming unit produces a perfectly adequate night guard if the model is dry, trimmed correctly, and the laminate is the right thickness. What undermines outcomes is not the budget choice but the inconsistent process around it.
The shift toward digital workflows helps here, not because digital is inherently more accurate, but because it removes the steps where human error concentrates: the pour timing, the bubble risk, the model moisture. A stored STL file does not distort overnight. That consistency is what reduces remake rates in high-volume labs, and it is why digital records for reorders are worth requesting from any lab you work with.
Clearretain’s self-impression workflow makes custom guards accessible
Getting a professionally fabricated custom guard no longer requires a dental appointment. Clearretain ships a detailed self-impression kit directly to you, and once your impressions arrive at the lab, experienced orthodontic technicians fabricate your guard using FDA-approved materials under professional supervision.
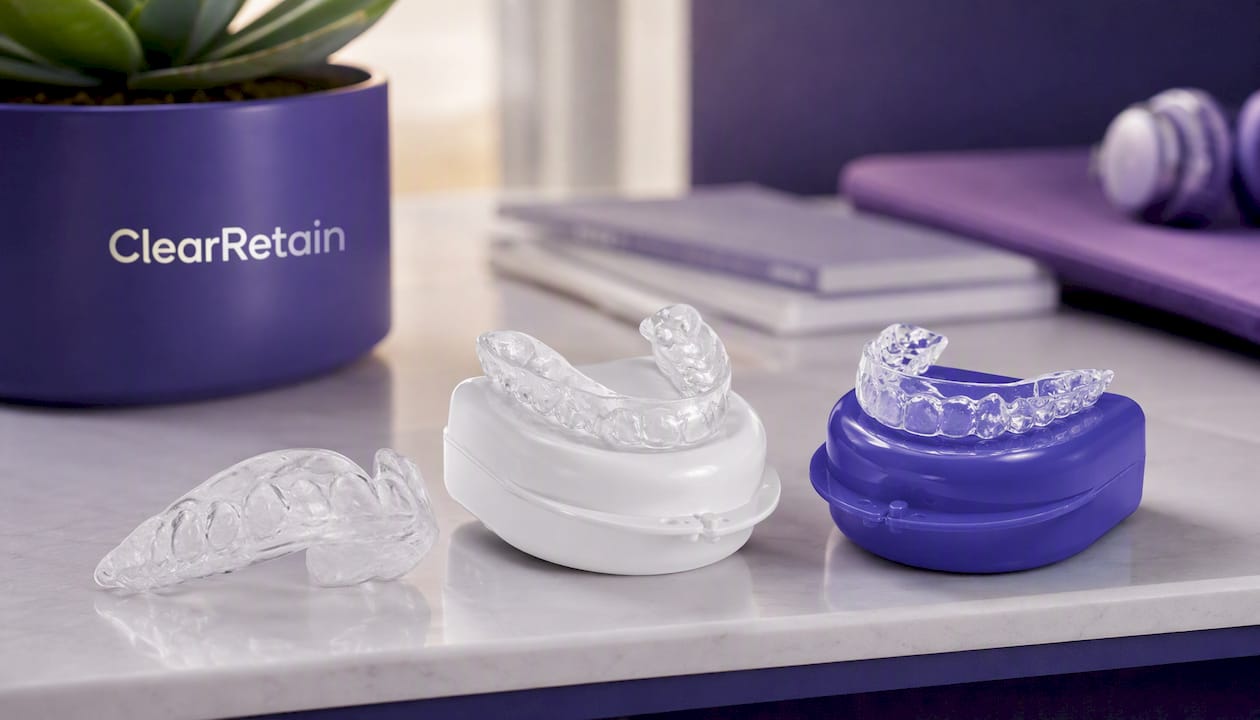
Clearretain’s product lineup maps directly to the fabrication workflows covered in this guide:
- Sports Mouth Guard: pressure-laminated, multi-layer construction for contact sports, meeting the dimensional standards recommended for high-impact use.
- Hard-Soft Night Guard (Dual Layer): dual-layer design with a soft inner comfort layer and a rigid outer shell, suited for moderate to heavy bruxism.
- Hard Night Guard: a rigid, durable appliance for long-term grinding protection, fabricated from high-quality hard acrylic.
Your digital impressions are stored after your first order, so reorders ship without a new impression kit. Pricing runs a fraction of clinic rates, with no office visit required. Visit Clearretain to choose your guard type and start your order today.
Sources
The following references were used throughout this guide and are worth bookmarking for deeper reading.
- Position Statement and Recommendations for Custom‐Made Sport Mouthguards - PMC
- Today’s Impression Techniques and Fabrication of Mouthguards
- Night Guards in Dentistry: Digital Design and Dental Lab Manufacturing
- Journal article on mouthguard fabrication techniques (JCDA)
This article is general information, not a substitute for advice from a qualified doctor. Consult a qualified healthcare professional about your own circumstances before acting on anything here.