


Home Dental Impressions: Get Accurate Molds for Retainers
Yes, you can take usable dental impressions at home, and they work well for a specific list of appliances: retainers, night guards, whitening trays, and sports mouth guards. The trick is using a real kit (not a warm-water boil-and-bite tray) and following the setting time to the second. Home dental impressions are not a substitute for a dentist’s chairside molds when you need a crown, bridge, implant restoration, or anything involving complex orthodontic movement. The FDA’s 510(k) clearance for OTC silicone impression material specifically limits lay use to simple appliances like nightguards, which tells you exactly where the regulatory line sits.
Your next move: pick a kit sized to your arch, skim the instructions or watch the included video once before you touch the putty, then work through the checklist below.
- Good fit for home kits: retainers, night guards, whitening trays, sports guards
- Not a fit: crowns, bridges, implants, multi-tooth restorative or ortho cases
- Do first: confirm tray size, read instructions, prep your mouth and mirror
Key Takeaways
Accurate home dental impressions depend on PVS material, a properly seated tray, full set time, and complete vestibule capture, not on any single product’s marketing claims.
| Point | Details |
|---|---|
| Know your limits | Home kits work for retainers, night guards, and whitening trays, not crowns, bridges, or implant cases. |
| Prioritize hold time | A tray pulled early causes more failures than imperfect mixing ratios. |
| Capture the vestibule | Extend material about 5mm past your last tooth to prevent a loose, rocking fit. |
| Choose PVS over alginate | PVS stays stable for shipping; alginate distorts if not poured within minutes. |
| Clearretain offers guided kits | Video-supported self-impression kits with FDA-approved materials and a fit guarantee. |
Table of Contents
- What Are At-Home Dental Impression Kits?
- How Do You Take an Accurate Impression at Home?
- Why Did My Impression Come Out Wrong?
- Which Material Gives the Most Accurate Impression?
- What Happens After You Ship Your Impressions?
- How Do You Choose the Right Impression Kit?
- ClearRetain’s Self-Impression Kit: What You Get
- Why Does Gumline Capture Matter So Much?
- What Actually Determines Whether This Works
- Get Your Retainer or Night Guard Started Today
- Frequently Asked Questions
- Sources
What Are At-Home Dental Impression Kits?
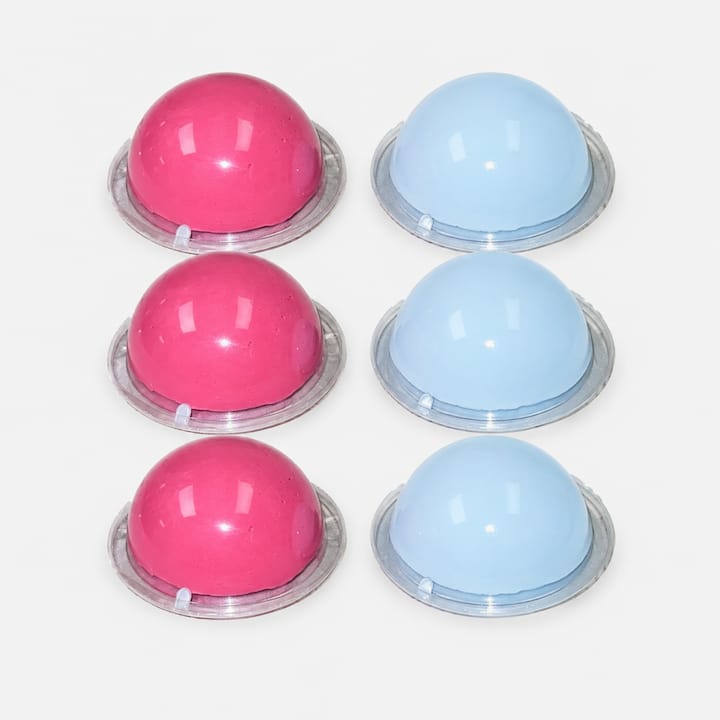
An at-home impression kit is a small box that replaces one dental office visit. Inside you’ll typically find preformed upper and lower trays, a putty or PVS (polyvinyl siloxane) cartridge with a mixing tip, a bite registration piece for some kits, prepaid return packaging, and written instructions with a companion video.
These kits are built for non-restorative appliances, meaning anything that sits over or against your existing teeth rather than replacing tooth structure. That’s retainers, night guards for mild to moderate grinding, whitening trays, and mouth guards. They are not built for crowns, bridges, implant-supported work, or cases involving active orthodontic movement, where the margin precision required goes beyond what a self-administered impression can reliably capture.
Before you buy, check for these signals that separate a legitimate kit from a cheap tray-and-putty combo:
- Step-by-step instructions plus a video walkthrough, not just a printed sheet
- Professional lab processing after your impressions arrive, not automated stamping
- A fit or satisfaction guarantee if the appliance doesn’t seat correctly
- FDA clearance status disclosed for the impression material itself
- A way to reorder later using stored digital files, so you don’t remold every time
How Do You Take an Accurate Impression at Home?
Getting a clean impression on your first try comes down to prep, timing, and pressure control. Rush any one of those three and you’ll be redoing it.
Before you start: Remove jewelry that could catch on the tray, brush and rinse your teeth to clear debris, and set a timer app on your phone. Test-seat the empty tray first to confirm it covers your back molars without pinching your cheek.
The procedure:
- Mix the putty or PVS base and catalyst exactly to the ratio and speed specified. Uneven mixing is the top cause of soft spots that never fully cure.
- Load the tray evenly, filling from the back forward so you don’t trap air at the molars.
- Seat the tray with steady, even pressure. Push straight up (or down for the lower arch), not at an angle.
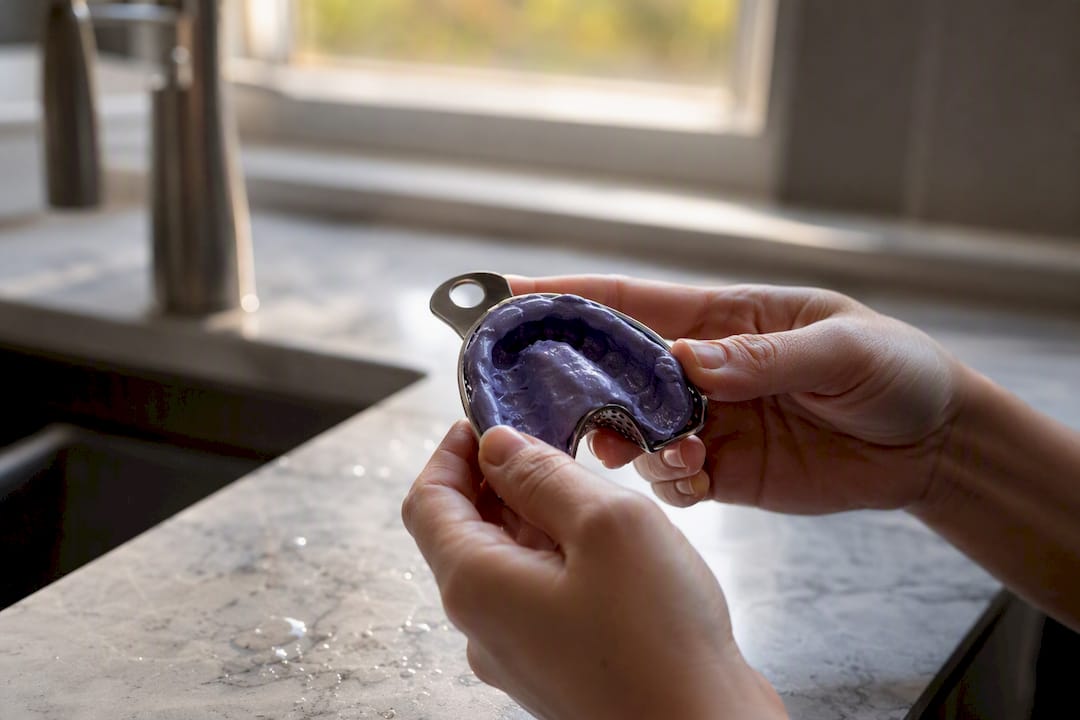
- Hold still for the full manufacturer-specified set time. Most PVS materials need the manufacturer-specified set time—typically a few minutes. Do not peek early.
- Remove the tray with one quick, firm pull rather than a slow rock, which can distort the impression.
- Inspect immediately under good light for bubbles, tears, or thin spots before you package anything.
Getting the details right here matters more than which brand of putty you buy. Correct tray selection, material handling, and seating technique are what separates a usable impression from a distorted one, regardless of setting.
If your kit includes a bite registration step, bite down in your natural, resting occlusion rather than clenching. Clenching shifts your jaw forward and gives the lab a false bite. Once your impressions look clean, follow the step-by-step packaging guide that comes with most kits to keep them from warping in transit.
Pro Tip: If you gag easily, tilt your chin slightly down instead of tipping your head back, and breathe through your nose in slow counts of four while the tray sets. Looking down shifts saliva forward and away from your throat.
Pro Tip: Check that putty extends a small margin past your last visible tooth on both sides to ensure proper fit. That extra capture of the vestibule and final molar is what keeps a finished retainer from rocking or slipping.
Why Did My Impression Come Out Wrong?
Most failed impressions fall into a handful of predictable categories, and nearly all of them are fixable on your next attempt.
- Air bubbles on the biting surface: usually from loading the tray too fast. Slow down and load from one end to the other in a continuous ribbon.
- You can see the tray through the putty: you didn’t use enough material. Reload with a thicker layer, especially over the biting surfaces.
- Missing vestibule (the fold behind your lips and cheeks): the tray was seated too shallow or removed too early. Reseat and hold the full time.
- Torn margins at the gumline: the tray was pulled at an angle. Pull straight out in one motion.
- Distorted bite registration: you clenched instead of resting naturally. Retake with a relaxed jaw position.
Most of these problems trace back to tray fit, isolation, or handling discipline rather than the material itself, so a second attempt with a slower pace often solves it. If you’ve retaken an impression three times and it still won’t seat clean, or if you have active gum disease, loose teeth, or multiple missing teeth in the impression area, stop and see a dentist instead of forcing a home kit to work.
Which Material Gives the Most Accurate Impression?
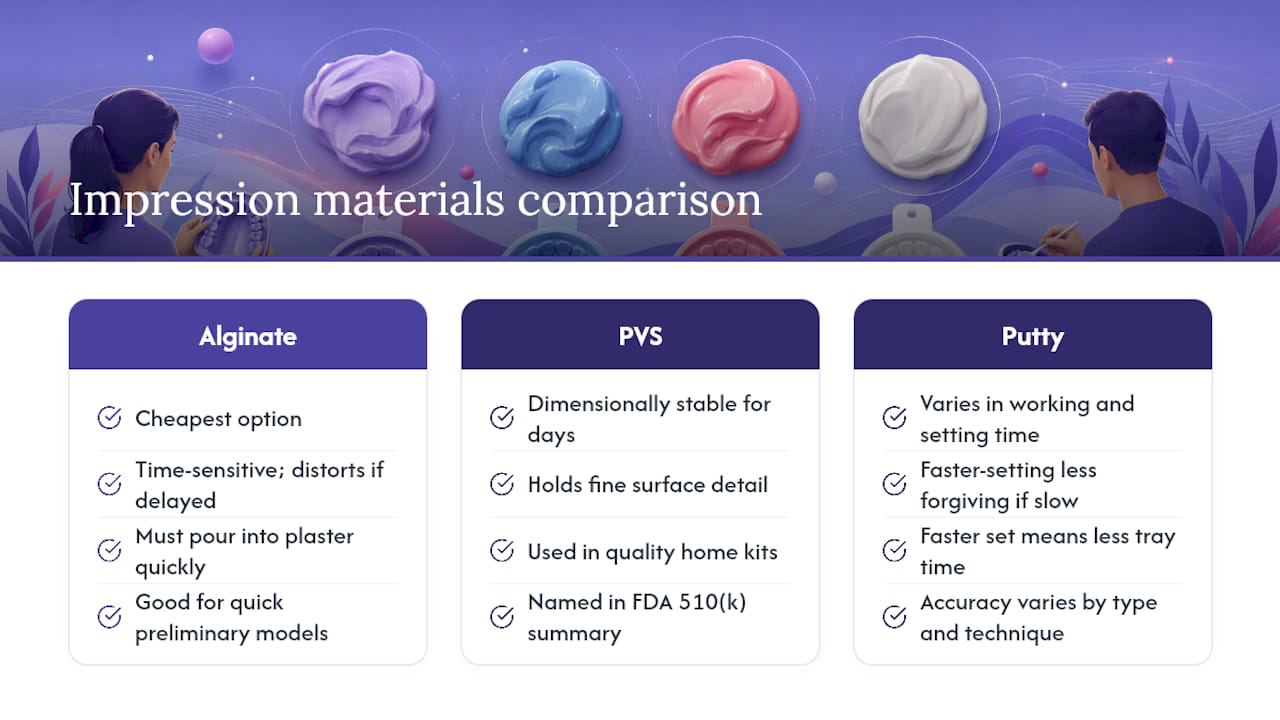
Not all impression materials are built the same, and the differences matter more than most kits advertise.
Alginate is the cheapest option and fine for a quick preliminary model, but it’s time-sensitive. It has to be poured into a plaster model shortly after removal or it distorts, which makes it a poor fit for a kit you mail across the country.
PVS (addition-cure silicone) is dimensionally stable for days and holds fine detail, which is why most quality home kits, including the material named in the FDA’s 510(k) summary for at-home nightguard impressions, use some form of it.
Putty types vary in working and setting time; faster-setting putty is less forgiving if your hands are slow, but it also means less time holding a tray in your mouth.
For a retainer or night guard, expect solid results if your technique is clean. For anything restorative, expect the gap between “good enough” and “clinically precise” to matter a lot more. A review of conventional impression techniques confirms that PVS remains the standard for cases requiring stability and fine detail.
Digital intraoral scanning skips the tray entirely and gives a dentist immediate feedback on the screen. Scans eliminate shipping distortion and often capture more surface detail than a physical mold, which is why many clinics have shifted toward chairside scanners for complex cases. Physical impressions still dominate for take-home kits because they don’t require expensive hardware or a clinic visit.
What Happens After You Ship Your Impressions?
Once your impressions arrive at the lab, a technician inspects them for bubbles, tears, and full arch capture before anything else happens. If they pass inspection, the lab pours a model or scans the impression digitally, fabricates your appliance, runs a quality check against your bite registration, then ships the finished product.
- Typical turnaround: most standard retainer and night guard orders finish within one to two weeks of the lab receiving usable impressions
- What slows it down: rush requests without paid expedited shipping, impressions that need to be redone, or combined upper-and-lower orders processed together
- Cost factors: appliance type, arch coverage, and whether you need a remake all affect price, so check the vendor’s reorder and guarantee terms before you buy
Read the fine print on any service page. A guarantee that covers a redo if the appliance doesn’t fit is worth more than a slightly lower sticker price.
How Do You Choose the Right Impression Kit?
Run through this before you add anything to your cart:
- Confirm the material is PVS, not alginate, if you want an impression that survives shipping.
- Check that tray sizes come in more than one option, since a poor-fitting tray ruins technique before you even mix putty.
- Look for written instructions plus a video, not one or the other.
- Ask whether the lab discloses its accreditation and who supervises appliance fabrication.
- Confirm the retake or refund policy if your first impression fails inspection.
A few quick questions to email the vendor before buying:
- Do you offer a free remake if my impressions don’t seat correctly?
- Can I reorder later using stored digital files instead of remolding?
- What’s your average turnaround from the day you receive my impressions?
Be skeptical of marketing language that blurs manufacturer claims with lab responsibility. A kit maker can promise “dentist-grade material,” but the actual fit depends on the lab that processes your specific impression.
ClearRetain’s Self-Impression Kit: What You Get
Clearretain’s kit ships with upper and lower impression trays, PVS putty cartridges, prepaid return packaging, and a printed guide alongside a full video walkthrough so you’re not guessing at timing.
Every kit uses FDA-approved materials, and appliances are fabricated under the supervision of experienced orthodontic technicians rather than run through an automated line. If your first impression doesn’t seat properly, Clearretain’s fit policy covers a redo instead of leaving you stuck with an appliance that rocks.
- Choose the Lower Teeth Retainer or Upper Teeth Retainer if you only need one arch
- Choose the Upper and Lower Retainers Set if both arches need coverage in one order
- Add Teeth Bleaching Trays if whitening is part of your plan, paired with the Tooth Whitening Serum for use with your finished retainer or night guard
Once your impressions are on file, reordering later doesn’t require remolding your teeth again.
Pro Tip: If you’re ordering both a retainer and whitening trays, ask about combining shipments. One packed return saves a step and gets both appliances processing on the same lab timeline.
Why Does Gumline Capture Matter So Much?
The single most overlooked detail in a home impression isn’t the material, it’s how far the putty extends past your visible teeth. Dental professionals stress that peripheral anatomy, the vestibule and final molar, directly determines whether a finished appliance sits stable or rocks against your gums.
Before you package anything, check for these two things:
- Roughly 5 millimeters of material visible beyond your last tooth on both sides
- Full detail around your back molar, not a cut-off edge where the tray ran short
Missing vestibule capture is a common reason appliances feel loose or cause irritation once you start wearing them, since the lab has nothing to anchor the fit against. If you have active gum disease, implants, several missing teeth, or you’ve failed the same impression more than twice despite good technique, skip the home kit and see a dentist for a professional mold instead.
What Actually Determines Whether This Works
Home dental impressions succeed or fail on three things: material stability, tray fit, and how disciplined you are about set time and pressure, not on which kit box looks the fanciest.
Most guides oversell the material and undersell technique. You’ll see kits marketed around “dental-grade silicone” as if the chemistry alone guarantees a good result. It doesn’t. A cheap PVS cartridge used with a properly seated tray and a full set time beats an expensive material rushed through in half the recommended minutes, every time.
The conventional advice to “just follow the instructions” undersells one specific risk: vestibule capture. Most first-time failures aren’t bubbles, they’re a tray that didn’t reach far enough back or wasn’t held long enough to record the fold behind the cheek. That single detail decides whether your finished retainer sits flush or rocks.
If you take one thing from this, prioritize the hold time over the mixing ratio. Slightly imperfect mixing usually still cures. A tray pulled ten seconds early rarely does.
Get Your Retainer or Night Guard Started Today
Clearretain skips the traditional path of scheduling an office visit, sitting through a chairside mold, and paying orthodontic office markups for a retainer or night guard you could take care of from your kitchen table. You order a self-impression kit online, follow the same video-guided process covered above, and mail it back, with fit backed by a guarantee and materials that are FDA-approved and processed under technician supervision.
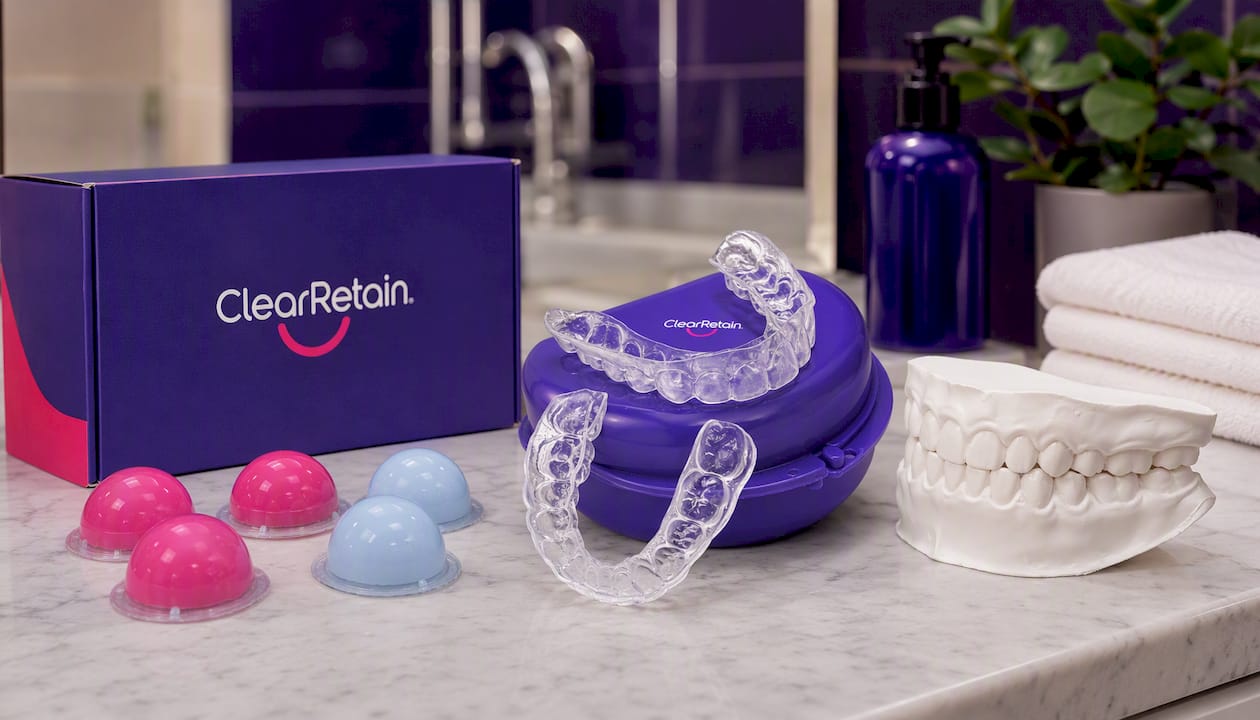
If you already know which arch you need, go straight to the Upper and Lower Retainers Set for full coverage, or the Lower Teeth Retainer if you only need one side replaced. Grinding at night rather than alignment is your concern? The Night Guards collection covers that instead. Once your impressions are on file, reordering later skips the remolding step entirely, so order your kit now and get your impressions in the mail this week.
Frequently Asked Questions
Can home dental impressions replace a dentist visit entirely? No. They work for retainers, night guards, and whitening trays, but crowns, bridges, and implant restorations still require a dentist’s chairside mold or a professional digital scan.
How long does it take to make dental impressions at home? The mixing and seating process takes about 10 to 15 minutes per arch once you’ve read the instructions, with most of that time spent holding the tray still during the set period.
What’s the best material for fast dental impressions at home? PVS (addition-cure silicone) is the standard choice for home kits because it stays dimensionally stable for days, unlike alginate, which needs to be poured almost immediately.
Can I reuse my dental impressions for a second appliance? Some providers, including Clearretain, store your digital files so you can reorder a retainer or night guard later without remolding your teeth.
What if my impression has air bubbles or looks incomplete? Retake it. Reload the tray more slowly and check that material extends fully past your last molar before you package anything for shipping.
Sources
- Technique and Materials for Predictable and Accurate Crown and Bridge Impressions
- How to do alginate impressions (Dentsply Sirona procedural guide)
- Dental Impressions Guide: Procedures, Trays, and Materials
- FDA 510(k) summary: Remi Impression Material (K251724)
Prefer a clinic-scanned digital option whenever restorative accuracy is on the line.